
July 21, 2025
Two-tone car designs are a stylish way to make your vehicle stand out by combining two complementary colors. This guide walks you through the process of planning, prepping, and painting a two-tone design on your car, covering everything from choosing the right color combinations to applying a flawless finish. Here's what you'll need to know:
If you encounter issues like uneven lines or paint bleed, proper masking and sanding can fix them. For complex designs or specialty finishes, consider hiring professionals like 1st Choice Collision for expert results. A well-executed two-tone paint job can completely transform your car's appearance.
Good planning is the key to turning a basic paint job into a professional masterpiece. Before you even think about picking up a brush or spray gun, you need a clear plan. Where will each color go? How will they complement each other? These decisions are the foundation of a polished and intentional design.
Two-tone paint jobs are making a comeback in modern car designs. However, achieving a seamless look takes more than just picking two colors. Rushed planning often leads to uneven transitions or clashing design elements, which can ruin the overall effect.
Once you’ve decided to go for a two-tone look, your next steps are choosing the right colors and mapping out their placement.
The success of your two-tone design hinges on color harmony. The colors you choose need to work together in various lighting conditions and should enhance your car’s overall appearance.
In January 2024, DAScenter.ae highlighted some classic combinations like black and white, red and white, or blue and silver for their timeless appeal. If you want to make a bold statement, they suggested more daring pairings like deep navy blue with vibrant yellow.
To make sure your chosen colors work well together, test small paint samples on a hidden part of your car. Observe how they look under different lighting conditions throughout the day. What looks great in the shade might not hold up under bright sunlight.
Don’t forget to take your car’s existing features into account. Chrome trim, wheel finishes, and interior accents all play a role in how the final design comes together. A mismatched color combination can clash with these elements, making the entire design feel disjointed.
The placement of your color transition line will define the personality of your two-tone design. Once you’ve picked your colors, the next step is deciding where each shade will go. This involves carefully studying your car’s contours, body panels, and architectural features. Some areas, like curved panels or vents, can be trickier to work with than flat surfaces.
Strategically placed transition lines can highlight your car’s natural curves and enhance its overall look. While every car is different, certain guidelines can help you achieve a professional finish. Manufacturers often refine their masking techniques to tackle the challenges posed by complex shapes.
Take your time with this step. Before you start painting, you should feel confident about your design. Walk around your car and examine it from every angle - what looks great from the side might not work from the front or rear. This is your chance to spot potential issues and make adjustments.
Be sure to mark areas like windows, trim, and other parts you want to protect from paint. Including these details in your planning sketch will save you from headaches later. Knowing your constraints upfront allows you to design around them, rather than discovering problems mid-project.
Finally, keep in mind that the complexity of your transition lines will affect how challenging the painting process is. Straight lines on flat panels are much easier to mask and paint than curved lines that follow intricate body contours. If you’re new to automotive painting, start with simpler designs before tackling more complex, flowing transitions.
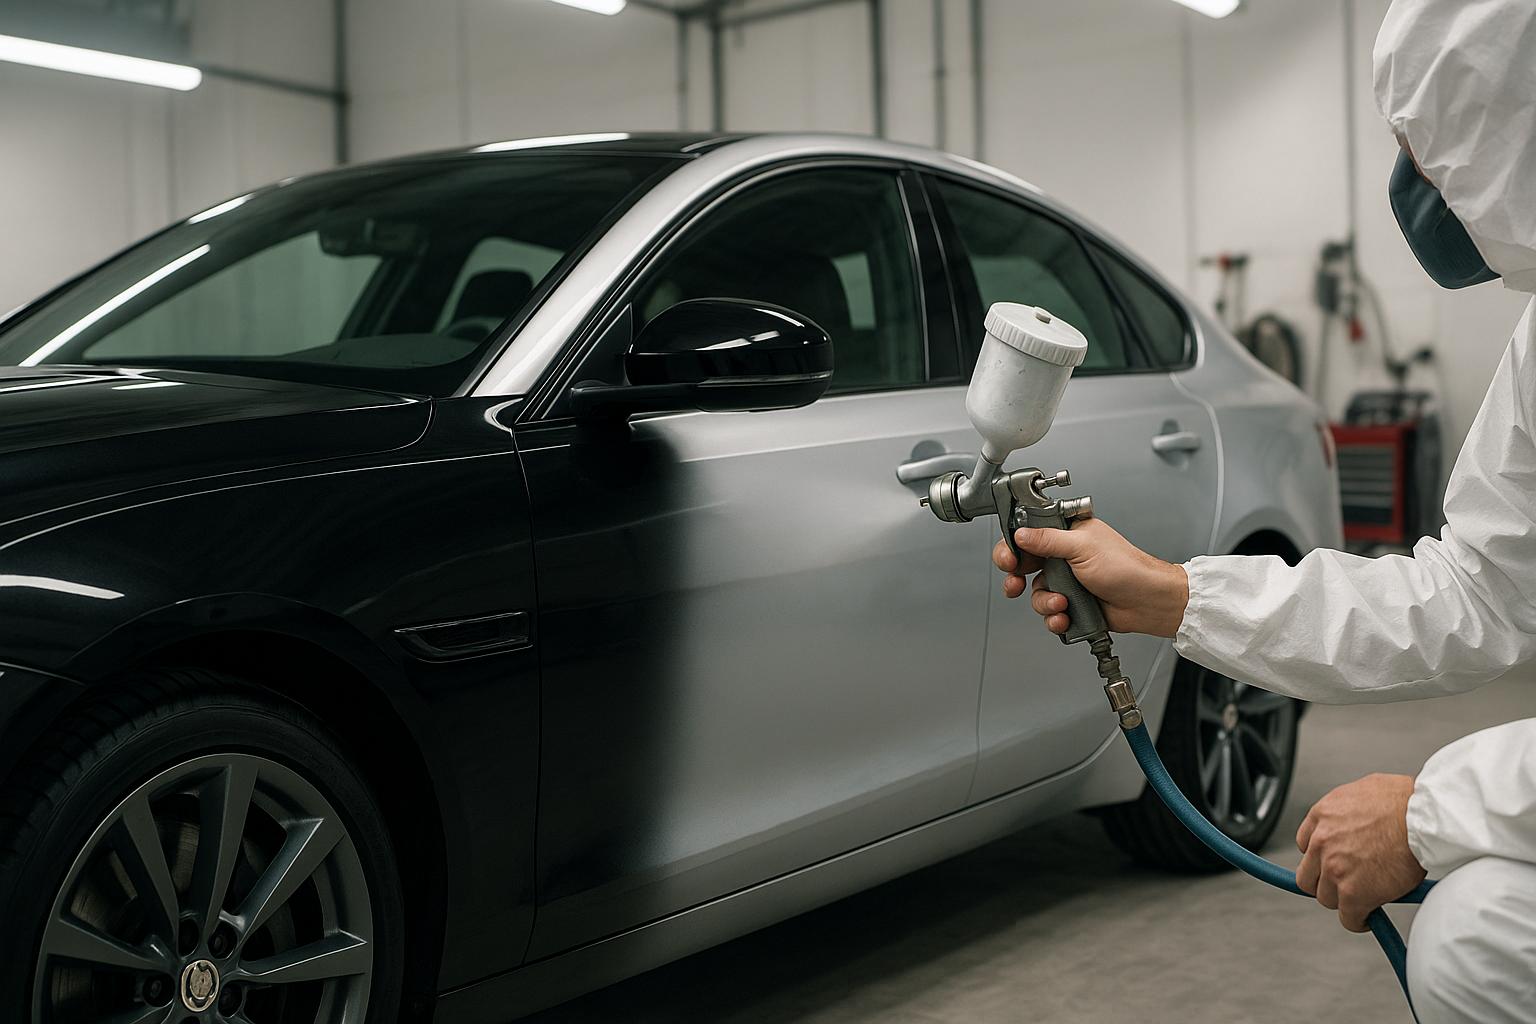
The right tools and materials can make all the difference between a professional-looking paint job and a subpar result. When it comes to two-tone car painting, having the correct equipment is essential. This process demands precision, so specialized automotive painting tools and materials are a must. Not only do they ensure clean masking and smooth application, but they also help you achieve the polished finish described in the steps ahead.
Automotive paint is specifically formulated for vehicle surfaces. Using anything else can lead to poor adhesion, durability issues, and a finish that just doesn’t look right. Additionally, automotive painting involves exposure to chemicals and spray processes that require proper safety precautions. Without the right protective equipment, you could be putting your health at risk.
A successful two-tone paint job starts with quality supplies. Here’s what you’ll need:
For spray guns, you have several options depending on your budget. The Eastwood Elite CC500 Color and Clearcoat HVLP Paint Gun is priced at $299.97 (regularly $349.99). If you’re working with primer, the Eastwood Elite P500 Primer HVLP Paint Gun costs $324.99. On a tighter budget? The Rockwood 10 Piece HVLP Paint Gun Set is a great starter kit for $81.99.
To create sharp transitions between colors, fine line masking tape is key. The Scotch High Performance Masking Tape 3434, priced at $57.60, provides the precision needed for crisp lines. You’ll also need premium clear masking film to prevent overspray.
Paint quantities vary based on your vehicle’s size. For small to medium cars, plan for 1 gallon of primer, 3 gallons of topcoat, and 2–3 gallons of clear coat. Larger vehicles may require 1½ gallons of primer, 4 gallons of topcoat, and 3–4 gallons of clear coat. Some product examples include Kirker Ultra-Glo Acrylic Urethane in Pure White for $69.95 and 3M Mar-Hyde Ultimate 2K Urethane Primer Surfacer Catalyst for $58.99.
Don’t overlook safety gear - it’s non-negotiable. Automotive paints contain chemicals that pose serious health risks.
"NIOSH describes isocyanates as 'powerful irritants to the mucous membranes of the eyes and gastrointestinal and respiratory tracts.'"
The risks aren’t immediate but tend to build up over time, impacting long-term health. Here’s what you’ll need for protection:
A clean surface is critical for a lasting, flawless paint job. Dust and debris can ruin your finish, so working in a clean, dust-free environment is essential. Ideally, use a paint booth equipped with a dust extractor, or thoroughly clean your workspace before starting.
Automotive cleaning solvents and degreasers are designed to remove oils and contaminants without leaving residues that could interfere with paint adhesion. For keeping your spray equipment in top condition, the Eastwood Paint Gun and Equipment Cleaner starts at $34.99.
To improve adhesion on tricky surfaces, BULLDOG Single Shot Adhesion Promoter is available for $21.95. Consistent air pressure is also crucial for an even spray pattern, and the Anest Iwata Air Flow Regulator at $89.95 can help with that. To avoid impurities in your paint, use Astro Pneumatic Nylon Mesh Paint Strainers, priced at $37.99.
Matching your car’s existing paint is easier when you use the color code from your vehicle’s compliance plate. Before painting, practice your spray technique on scrap metal to minimize errors.
Additional tools to consider include Astro Pneumatic 12" Bamboo Paint Paddles for $74.95 and the Astro Pneumatic Adjustable 7ft Paint Hanger for $129.95. These accessories make mixing paint and positioning panels for optimal spraying angles much easier.
With the right tools, materials, and preparation, you’ll be well-equipped to begin your two-tone car painting project.
Once you've planned your design and gathered the necessary tools, it's time to prepare the car's surface. Proper preparation is essential for achieving a clean, long-lasting finish. Even the best paint won't hold up on a surface that's not properly cleaned and prepped, so this step is crucial to the outcome of your project.
Start by thoroughly washing your car using automotive soap or a degreaser. Pay extra attention to areas like door handles, trim, and other high-contact spots, as these tend to collect dirt and oils that could interfere with the paint.
Once the car is clean, carefully inspect the entire surface for rust, scratches, dents, or other imperfections. Address these issues as needed. For rust and old paint, tools like wire wheels can remove heavy rust, while sanding discs provide more controlled removal. Begin sanding with coarse grit paper, then gradually move to finer grits - 220–320, followed by 400–600 grit - to create a smooth surface. If rust is present, apply a rust inhibitor before moving forward. The goal is to leave the surface with a slight texture to help the primer adhere properly.
Always wear nitrile or latex gloves during this process to avoid transferring oils from your hands onto the freshly cleaned surface. Use professional paint prep wipes instead of paper towels or shop rags, and finish with a tack cloth to remove any remaining dust particles.
Good masking is key to achieving crisp, clean lines in your two-tone paint job. The method you choose will depend on the design you're working with.
For straight lines, use high-quality masking tape such as 3M vinyl tape or Norton "fine line" tape. Apply the tape in a single, continuous strip, avoiding overlaps that could cause ridges or allow paint to seep through. Press the edges of the tape down firmly using a squeegee or your finger to ensure a tight seal, especially on the side exposed to paint.
If your design includes curves, opt for a flexible customizing tape that can easily conform to the car's contours without lifting or bunching. For tight curves, work in shorter sections of tape rather than trying to apply a long strip, as this gives you better control and ensures consistent adhesion.
For areas like door jambs where you want a softer, feathered edge, foam tape works well. Similarly, flexi no-edge blending tape is perfect for eliminating hard lines entirely.
Once the tape is in place, follow the manufacturer's guidelines for timing its removal to avoid damaging the paint finish.
To protect larger areas from overspray, use masking paper or plastic sheeting along the tape lines. Make sure these coverings are secured tightly so they don't shift during the painting process.
With the surface properly prepped and masking complete, you're ready to move on to the painting stage.
Now that your surface is prepped and ready, it’s time to dive into the painting process. With a clean and properly masked surface, here’s how to apply your two-tone design with precision.
Start with the lighter color - it lays the groundwork for the darker shade to stand out.
Begin by sealing the transition area, then apply two even coats of the base color. Make sure each coat dries thoroughly before moving on. Once the base color is dry, wet sand the surface using fine-grit sandpaper to achieve a smooth finish, then wipe away all dust with a tack cloth.
Next, use fine line masking tape to mark the exact line where the two colors will meet. For a clean transition, lightly spray a coat of the base color along the masking tape line and let it dry to the touch. This step helps seal the tape edge before applying the darker color. Then, spray two even coats of the darker color, stopping at the masking line. Avoid over-spraying or creating heavy layers.
Mike Muir, a seasoned refinish expert, emphasizes this point:
"You want the minimum mills of blue paint so it takes fewer coats of clear to give you a smooth transition from blue to white with no ridge."
Carefully remove the masking tape while the paint is still tacky - usually within 15–30 minutes. This prevents hard edges that could chip or form ridges. Once the colors are flawless, move on to protecting your work with a clear coat.
The clear coat is your paint’s armor. It shields the base coat from damage and UV rays while adding that glossy, showroom-like finish. Apply several thin layers of clear coat, allowing proper drying time between each coat as recommended by the product instructions.
For the best results, keep your workspace at around 70°F (21°C) with 50% humidity. This helps the clear coat flow evenly and prevents issues like orange peel. Once the clear coat has cured (typically 24–48 hours), refine the finish by wet sanding small sections with 2000–3000 grit sandpaper. Use light pressure, and follow up with a polishing compound to bring back the shine and remove any sanding marks.
After about 30 days - when the paint has fully cured - apply a high-quality automotive wax. This final touch boosts color depth, enhances the shine, and adds an extra layer of protection against wear and tear. Without clear coat protection, your paint is more vulnerable to peeling, rust, and other damage over time.
Even with the best preparation and techniques, two-tone paint jobs can throw unexpected challenges your way. Knowing how to tackle these issues - and when it’s time to bring in the pros - can save you from unnecessary frustration and extra costs. When DIY fixes fall short, calling in a professional might be the smartest move.
Uneven lines can be a real headache. These usually happen due to improper masking. To fix this, refine your tape application by ensuring a tight seal. Use a putty knife or even a credit card to press down the edges of the tape securely before spraying. If you notice uneven lines after painting, you’ll need to sand the area, re-mask it, and try again.
Paint bleed is another common issue, occurring when the second color seeps under the tape, ruining the transition. To avoid this, apply a sealer coat along the transition lines before painting. If the damage is already done, sand the affected spot with fine-grit sandpaper and repaint using proper sealing techniques.
Color mismatches can easily derail your project. To ensure accuracy, work with a trusted automotive paint supplier that offers custom mixing services. Providing your car’s VIN can help them match the original color precisely. Specialty finishes like metallic or pearl paints are especially tricky, so don’t hesitate to leave these to the experts if needed.
Orange peel texture - that uneven, bumpy finish - usually results from incorrect spray settings, paint viscosity, or environmental factors. Fix this by wet sanding with 2000–3000 grit sandpaper and lightly polishing once the clear coat has dried. Work in small sections to avoid damaging the paint.
Dirt nibs, caused by dust or debris landing on wet paint, can ruin the finish. To fix minor nibs, sand them out with fine sandpaper and polish the area. If the problem is widespread, you may need to repaint the panel. Prevention is your best defense - keep your workspace clean and use tack cloths frequently during prep.
Environmental factors can also wreak havoc. Water spots from rain or sprinklers can etch into fresh paint; remove these with acidic cleaners or machine polishing. Buffer trails or holograms from improper polishing require attention from a skilled detailer using advanced paint correction methods.
When these fixes don’t resolve the problem, it’s time to consider professional help.
If you’re struggling with recurring issues or tackling a particularly complex design, turning to a professional shop can save you time and effort. Intricate two-tone designs - especially those involving curved panels, vents, or detailed body lines - often require specialized equipment and expertise beyond what most DIY setups can handle.
1st Choice Collision is a trusted name for custom auto paint jobs, with the skills and tools to manage even the most challenging two-tone projects. Their team excels at masking tricky surfaces, matching specialty paints like metallics and pearls, and achieving flawless spray patterns for a professional-grade finish.
Plus, their lifetime nationwide guarantee on all repairs ensures your investment is well-protected.
If your project involves multiple color transitions, significant bodywork, or specialty paints that demand precise application, professional services are the way to go. From prepping the surface to applying the final clear coat, 1st Choice Collision delivers results that rival or exceed factory standards.
Achieving a flawless two-tone finish requires careful preparation and attention to detail. The difference between a DIY project and a professional-grade result often lies in the small but crucial steps - everything from proper surface prep and masking techniques to smooth spray patterns and seamless color transitions.
Start by thoroughly cleaning, priming, and sealing your car. A clean workspace and high-quality materials can take your DIY effort to the next level, creating a finish that looks straight out of a showroom. Masking is key - using automotive-grade tape, applying sealer coats along transition areas, and peeling the tape while the paint is slightly tacky can make all the difference in achieving crisp, clean lines.
While many techniques can be mastered at home, some aspects of two-tone finishes are best left to professionals. For intricate curves, complex body lines, or specialty finishes, expert tools and experience are often necessary. For example, 1st Choice Collision has over 20 years of experience in custom paint projects and employs I-CAR Gold Class technicians who use AkzoNobel Lesonal Waterbase Paint for exceptional results.
Their process includes baking vehicles at 140°F for 40 minutes, ensuring optimal adhesion and long-lasting durability. This level of precision, combined with guaranteed color matching, often surpasses factory standards.
"First Choice Collision guarantees to repair, free of charge, any defects in workmanship for as long as you own your vehicle."
Whether you go the DIY route or opt for professional help, balancing your ambition with quality is essential. A well-executed two-tone design can completely transform your vehicle’s appearance. For intricate designs or the peace of mind that comes with a lifetime limited warranty, professionals like the team at 1st Choice Collision can turn your vision into reality without the risk of DIY missteps.
When selecting colors for a two-tone car design, focus on combinations that both contrast and work harmoniously together. Timeless pairings such as black and white, silver and red, or white and dark blue are great options for a classic aesthetic.
Steer clear of colors that clash or feel overly busy. Instead, pick tones that highlight the car's shape and complement its overall design. If you're aiming for a striking look, high-contrast colors can make a bold statement. On the other hand, softer shades can deliver a more understated and elegant vibe.
To get those sharp, clean lines for a two-tone car paint job, start with high-quality automotive masking tape that's made to resist solvents and won't leave behind sticky residue. Carefully apply the tape along the edges where the two colors will meet, pressing it down firmly to ensure it sticks well. For curves or detailed designs, fine-line or vinyl tape is your best bet for extra precision.
Before you start painting, double-check that the tape is positioned correctly and lies completely smooth. Any gaps or uneven edges could lead to paint bleeding through. As you apply the tape, stretch it slightly to create a snug seal, and use a soft tool - like a cotton swab - to gently press down and burnish the edges. These steps will help you achieve those crisp, professional-looking lines that make a two-tone design stand out.
When working on a two-tone paint job for your car, safety needs to come first. Always wear a respirator to shield yourself from hazardous fumes, and make sure you’re in a well-ventilated space to minimize exposure to paint particles. Protect your skin by wearing gloves, long sleeves, and other protective clothing to avoid direct contact with paint or chemicals. Be cautious when handling paints and solvents to prevent spills, and keep a fire extinguisher within reach since some materials can be flammable. These steps will not only keep you safe but also help you achieve better results.