
December 7, 2025
When documenting dents after a car accident, clear and detailed photos are essential for speeding up your insurance claim and ensuring accurate repairs. Poor-quality images can delay the process, reduce payouts, or lead to disputes. Here’s a quick summary of how to take effective photos:
These steps help insurers assess damage quickly, reduce disputes, and expedite repairs. Detailed photos also assist repair shops in planning the work accurately.
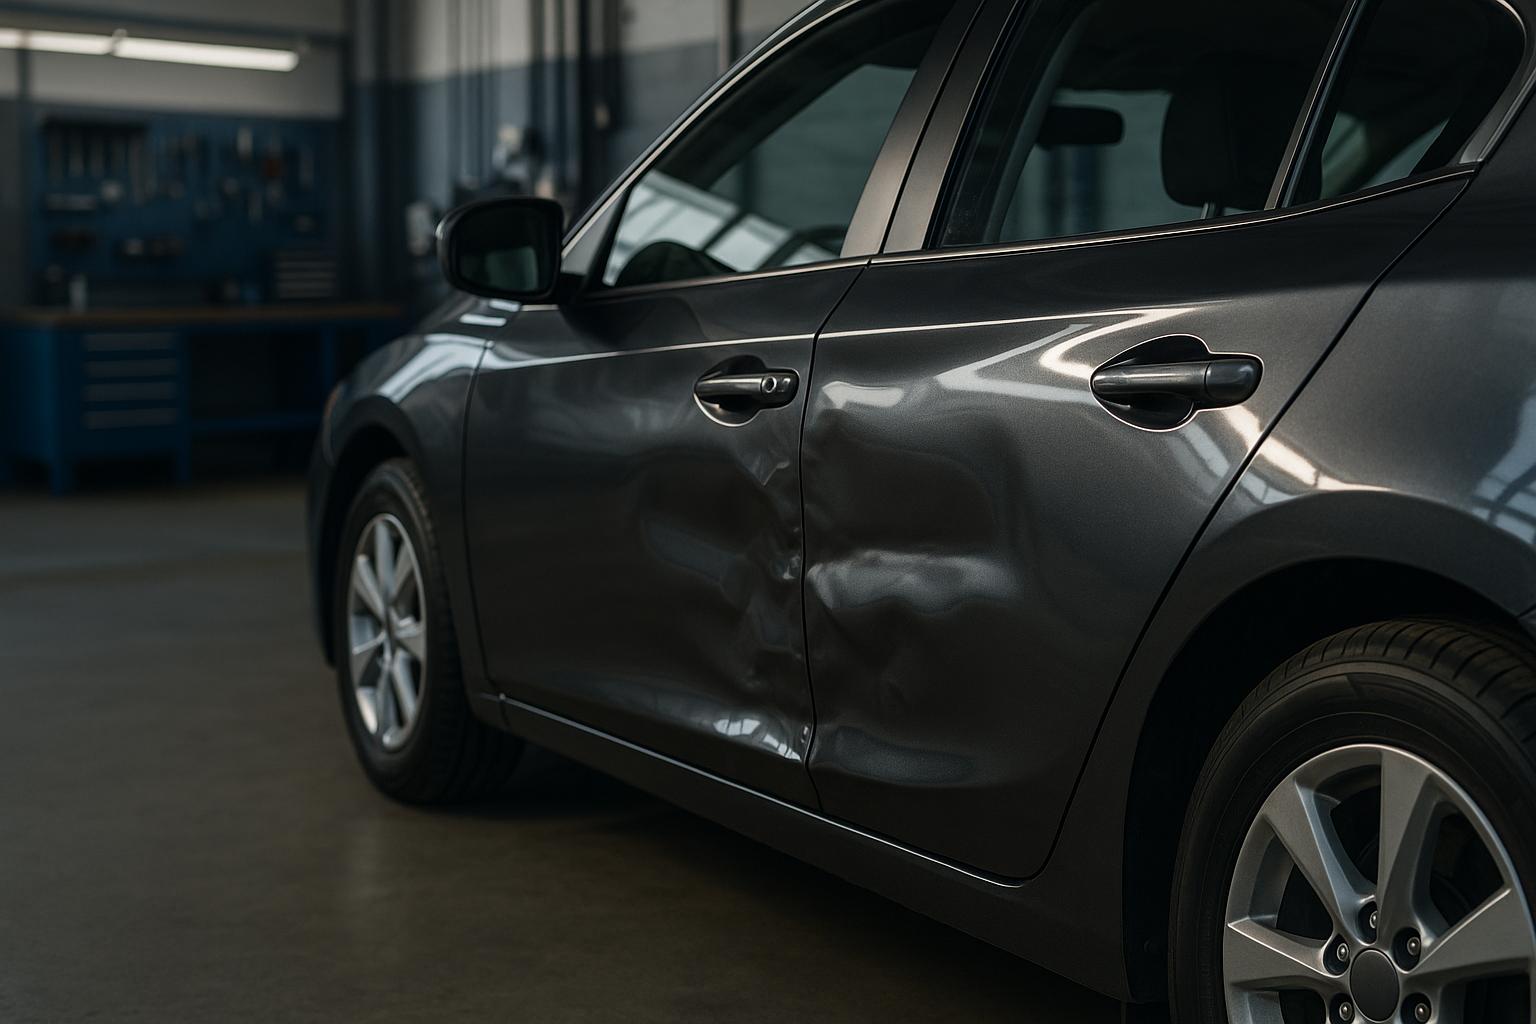
Dents can be tricky. What looks minor from one perspective might reveal deeper creases or a larger spread when viewed from another angle. The curved surfaces of your car’s body panels often disguise the true extent of the damage when photographed from just one position. That’s why insurance adjusters and repair shops need photos that show how the dent impacts body lines, panel gaps, and surrounding areas.
For each damaged spot, aim to take at least six photos: one straight-on, two from 45-degree angles (left and right), one from a low angle looking upward, one from a higher angle looking downward, and one that provides context by showing nearby body lines, trim, or panel edges. This approach mimics how professionals inspect damage during assessments.
Imagine walking the face of a clock around the dent. Start at 9 o’clock, then move to 10:30, 12, 1:30, and finally 3 o’clock, taking a photo from each position. This technique helps you capture the dent’s depth and shape using reflections or environmental features as guides. For example, position yourself so a straight reflection - like the edge of a building or a light pole - passes through the damaged area. As you change angles, notice how the reflection bends or distorts at the dent, revealing its true shape.
These varied shots are invaluable for repair shops. When you visit a collision center like 1st Choice Collision, clear images from multiple angles allow technicians to determine whether the damage affects just the surface or extends to structural elements like door frames or body lines. This detailed visual record helps ensure a more accurate estimate and can even speed up the repair process.
If the damage spans multiple panels or wraps around corners, take wide shots from different heights to capture the full context. For example, if a dent on the rear quarter panel stretches into the bumper, photograph each panel individually and include wider shots to show how they connect. In cases of scattered damage, such as hail, angled shots across each affected panel can help reveal smaller dents that might not stand out in a single, straight-on photo.
Here’s a quick checklist to ensure you capture everything: walk around your car and photograph each side; for every damaged area, take one straight-on shot, two angled shots (left and right), one low shot, and one high shot. Review your photos to ensure none are blurry or too dark, and retake as needed. Think in terms of "wide, medium, close-up - from different sides" to make sure you cover all the details.
Finally, don’t stand too close to the damage when taking photos. If you’re too close, the images may only show the dent itself without providing important context. Step back a few feet so the photos clearly show the dent’s location on the panel and how it relates to nearby seams, trim, or other features. This approach ensures adjusters and repair technicians get the complete picture.
Once you’ve taken wide shots of the damage, it’s time to zoom in - literally. Close-up photos are essential for capturing the fine details of each dent, such as its depth, edges, and texture. While wide shots show the location, close-ups reveal the true nature of the damage.
Instead of relying on digital zoom (which can make photos blurry), physically move closer to the dent. The goal is to fill most of the frame with the dent and a small portion of the surrounding panel. This ensures insurance adjusters and repair technicians can clearly assess the damage without distractions.
Make sure your photos are sharp. Tap to focus on the dent, then zoom in on the preview to check for clarity. If the edges look fuzzy, retake the shot. Clear and detailed images are critical for building a solid claim.
Lighting is another key factor. Adjust the light to highlight the contours of the dent. Early morning or late afternoon sunlight works best, as it creates shadows that emphasize depth. If you’re working in bright midday light or indoors, use your phone’s flash - even during the day. This “fill flash” technique can bring out details like paint chips or sharp creases that might otherwise go unnoticed.
Take at least three close-up shots of each dent: one straight-on and one or two from slight left and right angles. These varied perspectives help adjusters better understand the dent’s shape and depth. If reflections from shiny paint obscure the damage, adjust your position or move the car into the shade to get a clearer view.
For one of the close-ups, place a familiar object - like a coin or a key - near the dent (but not on it) to provide a sense of scale. Avoid including objects in your other close-ups to keep the focus solely on the damage. This simple step can prevent disputes later over the size of the dent.
Don’t overlook smaller dents. Even minor damage can add up in repair costs, and missing them in your photos could lead to an underestimated claim. For example, a tiny dent near a wheel well might seem insignificant but could require extensive work like panel removal or paintless dent repair (PDR). Taking the time to document every dent, no matter how small, can save headaches down the line.
Close-ups are especially helpful if your car needs PDR. These photos allow technicians and insurers to evaluate whether the dent meets the criteria for this repair method - such as being shallow, accessible from behind, and free of paint damage. If you visit a repair shop like 1st Choice Collision, which specializes in PDR, these images can help the team quickly assess the damage and provide an accurate estimate.
Be thorough. Document any related issues around the dent, such as chipped paint, cracks, widened panel gaps, or sharp edges. These details help adjusters determine whether the damage is surface-level or extends deeper into the panel, ensuring the right repair method is approved without unnecessary back-and-forth.
Finally, back up your photos. Upload them to cloud storage or email them to yourself. This small step ensures you won’t lose critical evidence if your phone gets lost or damaged after the collision.
| Close-Up Technique | Purpose | Practical Tip |
|---|---|---|
| Fill frame | Show size and shape | Move closer to the dent; avoid digital zoom |
| Multiple angles | Reveal depth and contour | Take straight-on and angled shots |
| Angled lighting | Highlight dent edges | Use early/late sunlight or a side flashlight |
| Use flash as fill | Enhance fine details | Turn on flash even in daylight |
| Include scale object | Provide size reference | Add a coin or key in one shot only |
| Check focus & sharpness | Ensure usable photos | Zoom in on preview; retake blurry shots |
These detailed close-ups are more than just photos - they’re the foundation for the entire repair process. They help insurers assign fault, approve accurate repairs, and determine fair compensation. For repair shops, these images ensure all damage is accounted for in their estimates. And if hidden damage is discovered later, your original photos can justify any additional repairs, minimizing delays and disputes.
Lighting plays a key role in capturing clear photos of dents. Proper lighting ensures that even shallow dents, which might be obvious in person but nearly invisible in poor lighting, are clearly visible in your photos. This helps prevent adjusters from underestimating the damage.
The best option is indirect natural daylight, especially in the early morning or late afternoon. This softer light creates subtle shadows that highlight dents without causing harsh glare. If you're working midday and the sunlight feels too intense, move the vehicle into open shade - such as under a carport or next to a building. This keeps the light bright but diffused. Position the car so the light source hits from the side rather than directly in front or behind your camera. Adjust your position to avoid glare on the surface.
Overcast skies are another great lighting condition. The soft, even light eliminates harsh shadows and reflections, helping subtle dents stand out more clearly.
For shallow dents, try using raking light. This technique involves positioning the car so one side faces a strong, soft light source. Then, move your viewpoint along the panel until you spot slight distortions in the reflections. Dent repair specialists often use this method to reveal contours and imperfections.
If you're working in low-light conditions - like at night or in a dimly lit parking garage - use a steady light source. A flashlight, work light, or even your phone's flashlight can work well when held at an angle to create contrast and outline the dent's edges. Avoid relying on overhead lights alone, as they tend to be too diffuse to capture the detail you need. Also, skip using your camera's built-in flash. Direct flash often creates bright spots and glare, washing out the details of the dent.
Before finishing, zoom in on your photos to check if all dents, creases, and chipped paint are visible. If anything is unclear, adjust your position or the lighting - reposition the car, move into shade, or tweak the angle of your light - and take the photos again.
Here are a few extra tips to improve your shots:
Professional collision centers, like 1st Choice Collision, rely on controlled lighting setups - such as bright overhead lights, light bars, and reflective boards - to accurately assess panel damage. By using strong side lighting and capturing photos from multiple angles, you can ensure that every dent is well-documented before submitting your images to your insurance company.
After capturing close-up shots of specific damage, wide shots are essential for providing the bigger picture. These images offer the context needed for a complete damage assessment, helping insurance adjusters and repair shops understand the overall extent of the damage.
Start by taking four main wide shots: one from each corner of the vehicle. Position yourself at the front-left corner, then move to the front-right, rear-left, and rear-right. This approach ensures a full view of the vehicle’s exterior, leaving no area undocumented.
To further complete the damage overview, include straight-on shots of the front, rear, and both sides of the vehicle. These angles help create a comprehensive "damage map", showing the vehicle’s overall condition before repairs begin. When framing these shots, make sure to include reference points such as doors, wheels, bumpers, or headlights. These landmarks help pinpoint the exact location of dents or scratches, reducing confusion and expediting claims processing.
If the damage involves hail or multiple small dents, overhead shots of the hood, roof, and trunk can be particularly useful. To get these angles, you might need to stand on a curb, step stool, or even a higher level of a parking structure. Capturing the full spread of dents from above provides a clear view of the pattern and extent of damage, which is especially helpful for hail-damage specialists.
Wide shots are also invaluable for collision repair centers like 1st Choice Collision, which specialize in collision and paintless dent repair. These images allow technicians to assess the full scope of damage across all panels and identify hidden issues that might not be obvious in close-ups. For example, a wide shot could reveal roof and trunk dents from a hailstorm or misalignment caused by a collision. This helps repair centers create more accurate estimates and ensures every issue is addressed under their nationwide lifetime repair guarantee.
Here are some tips to ensure your wide shots are clear and effective:
After capturing your wide shots, label them clearly to keep everything organized. Use file names that specify the angle or section of the vehicle, such as "2025-12-08_Vehicle_FrontLeft.jpg" or "Hail_Damage_Roof.jpg." Clear labeling makes it easier to connect wide shots with their corresponding close-ups, speeding up the claims process and reducing the risk of overlooked damage.
Wide shots also help you cross-reference close-up photos. For example, if you note "Dent #3 – passenger rear door, see wide shot P3 for location", it creates a clear link between detailed and contextual images. This level of organization ensures adjusters and repair technicians have a complete understanding of the damage.
After taking detailed photos of the damage, the next step is to capture your vehicle's identification and the accident's context. This means photographing your VIN (Vehicle Identification Number) and the accident scene to ensure you have all the evidence you need.
The VIN is a 17-character code unique to your vehicle. By photographing it, you confirm your car's identity and help adjusters tie the damage to your claim. This step avoids confusion about which vehicle the claim refers to and ensures all documentation is connected to the right car - especially important if you're filing multiple claims.
You can usually find the VIN in one of three places:
When photographing the VIN, make sure all 17 characters are clear and legible. Use good lighting and hold the camera steady. If you're shooting through the windshield, adjust your angle to avoid glare or reflections. The VIN provides insurance companies with key details about your vehicle, like its make, model, year, and engine type, which helps in assessing damage and processing claims.
Next, capture the accident scene in detail. Take wide-angle shots to show vehicle positions, skid marks, debris, traffic signs, road markings, and any obstacles like potholes or construction zones. Don’t skip over environmental conditions - photograph wet, icy, or snow-covered roads, poor lighting, fog, or sun glare. These details help establish the circumstances of the collision and can support claims about negligence or liability.
Make sure to record the exact location, date, time, and any recognizable landmarks. Photos showing the relationship between your vehicle and nearby landmarks, traffic signals, or road features can provide essential context.
Whenever possible, take these photos immediately after the collision, ideally within 24 to 48 hours. However, if it's unsafe to exit your vehicle or access the VIN at the accident scene, prioritize your safety. You can document the VIN later when the car is in a secure location, like at a repair shop or your home.
Thorough documentation of the environment can reduce the chance of disputes with insurance adjusters. By photographing details like road conditions, debris, and skid marks, you create objective evidence that supports your account of the accident. This can lead to quicker claim approvals and potentially fairer settlements.
For example, professional collision repair facilities like 1st Choice Collision use a systematic approach to document vehicles. They take multiple angles of the VIN, detailed scene photos, and organize everything meticulously. This ensures every detail is recorded and addressed under their nationwide lifetime repair guarantee.
To protect your claim, avoid common mistakes like failing to capture all VIN characters clearly, neglecting to photograph enough of the surrounding area, ignoring environmental factors, or forgetting to note the date, time, and location. These small oversights can make a big difference in how smoothly your claim process goes.
After capturing detailed photos of the damage, the next step is to arrange them in a way that makes it easy for adjusters and repair shops to review. A smart approach is to organize your images as if you're conducting a full walk-around of the vehicle. Start with wide-angle shots from each corner, then go panel by panel, moving from overall views to close-up details.
This method mirrors how collision repair technicians create repair estimates. By following this structure, repair shops like 1st Choice Collision can quickly assess the damage, decide if paintless dent repair is an option, and prepare a preliminary estimate - all before your car even arrives. A logical photo order streamlines the claims process and ensures nothing gets overlooked.
To keep everything clear, label your photos with a simple three-part code: the area of the car, the type of view, and a sequence number. For example:
Additionally, name the main folder with the date and your claim number, like "12-08-2025_Accord_Claim123456." This makes it easy for everyone involved to match your photos to the correct file.
Before you start sorting, consider creating a damage map on paper or in a digital note. List all sections of your vehicle - front bumper, hood, driver’s side door, roof, trunk, and so on. As you group your photos, check off each section to ensure you’ve covered everything. This checklist helps you stay organized and ensures no damage is missed.
Keep your damage photos separate from other documentation, such as pictures of the VIN, license plate, or accident scene. Use clearly named folders for organization, like:
This separation eliminates confusion and makes your claim file easier to navigate.
Before submitting, review your album as if you were inspecting the car in person. If a photo’s context isn’t immediately clear - like how a close-up relates to the overall damage - add a label or include a medium shot for clarity. It can also help to have someone uninvolved in the accident review your photos. This fresh perspective ensures that an insurance adjuster can follow the sequence without confusion.
Random, disorganized photos can lead to missed damage, lower settlement offers, and frustrating delays. On the other hand, a well-structured photo set helps avoid unnecessary follow-ups and supplemental inspections, speeding up both claim approval and repair scheduling. Collision repair centers that provide lifetime guarantees rely on accurate documentation, so your organized photos also act as a valuable record if questions arise later about pre- and post-repair conditions.
Taking the time to arrange and label your photos properly can save you weeks of back-and-forth with your insurer. A clear, organized set of photos not only strengthens your case but also ensures every dent and scratch is accounted for in the final repair estimate.
Capturing damage under just one lighting condition might not reveal every detail. By photographing the damage in various lighting situations, you can highlight subtle differences that may otherwise go unnoticed. For instance, a dent that’s clearly visible in the shade might be hard to spot under direct sunlight, and vice versa. To give insurance adjusters and repair teams a complete picture, document the damage in multiple lighting scenarios - direct sunlight, shaded or overcast conditions, and low-angle light during early morning or late afternoon.
Shaded or overcast settings minimize reflections, allowing for a more uniform view of dents and scratches. Low-angle light, on the other hand, creates shadows within indentations, making even minor issues like hail damage or door dings more apparent.
Try taking photos both with and without flash to capture illuminated details and maintain natural color tones. This is especially useful for indoor or nighttime shots. Vary your camera height - experimenting from knee-level to chest-level - to uncover subtle variations that might otherwise be missed.
Leverage your smartphone’s manual exposure and HDR settings to balance shadows and highlights. By tapping directly on the damaged area and adjusting the exposure, you can ensure the details are evenly captured. For small or shallow dents, using a flashlight or LED work light at a low angle can create shadows that make imperfections stand out.
For each damaged panel, take three photos in every lighting condition: one straight-on and two at angles. Start with direct midday sunlight, then move the vehicle into the shade or wait for overcast skies. Follow up with low-angle or artificial light, whether during early morning, late afternoon, or indoors with controlled lighting. This approach ensures adjusters or repair shops, like 1st Choice Collision, can assess the damage thoroughly.
After taking your photos, review them immediately to confirm no details are overlooked. Zoom in to check the clarity of dent edges, and adjust your settings or position if needed. If possible, take an initial set of photos at the scene and follow up later in improved lighting. Avoid backlit shots (facing the sun), as these can create silhouettes and obscure key details. By being thorough, you can provide a complete visual record of the damage.
Photos play a critical role in how adjusters assess collision damage. Since most claims are handled remotely, high-quality images often carry more weight than verbal explanations. Clear, detailed photos of every dent immediately establish your vehicle's condition after the accident, align with your account of events, and make it harder for insurers to downplay the damage. These visual records build on the photo techniques discussed earlier.
Photos are your strongest defense against lowball offers and claim denials. By capturing every dent from multiple angles, you prevent insurers from minimizing the damage or attributing it to pre-existing issues. Including images of the accident scene - like debris, impact points, and surrounding areas - can also help clarify fault and reduce disputes about how the collision occurred.
Good documentation also speeds up the claims process. Adjusters often need more information when photos are blurry, incomplete, or poorly lit, which can delay decisions and lead to follow-up inspections. But when you submit a complete photo set - covering wide angles, close-ups, the VIN, license plate, and overall context - adjusters can quickly verify coverage, assess the damage, and approve repairs without unnecessary back-and-forth. Many U.S. insurers now rely on photo-based or virtual estimating, making strong initial documentation even more essential.
Accurate photos lead to precise repair estimates. They allow estimators to gauge the extent of damage across panels, identify affected edges or seams, and spot issues like cracked or stretched paint. These details help determine whether paintless dent repair is an option or if more extensive bodywork is needed. Repair centers like 1st Choice Collision use these images to verify insurance estimates and request adjustments if initial assessments miss damage.
Wide-angle shots of the entire vehicle provide an overview of its condition, ensuring all damage is accounted for and showing that dents are collision-related rather than pre-existing. Photos of the accident scene - skid marks, debris, traffic signs, and weather conditions - add context, supporting your version of events and helping establish fault. Capturing the VIN, license plates, and nearby property damage ties the evidence directly to your vehicle and the collision site.
Time-stamped, well-lit photos protect you long after the accident. If the other driver changes their story, new damage appears, or the insurer questions your claim down the road, your original images serve as proof of your car's condition right after the crash. Attorneys and experts can use these photos to reconstruct the accident, challenge a denial, or support legal action. Courts and arbitrators often prioritize clear, time-linked photo evidence over verbal accounts or memories.
Adjusters and repair experts look for specific details in dent photos, such as the location and number of damaged areas, the size and depth of dents, signs of stretched metal or sharp creases, paint damage, and any distortion along body lines that could indicate structural issues. Images that capture these elements help both insurers and repair shops like 1st Choice Collision create accurate repair plans and parts lists.
When your photos clearly document all damage, insurers are more likely to approve comprehensive repairs rather than just addressing the most obvious issues. This reduces the risk of out-of-pocket costs for missed damage. Precise documentation also ensures the claim payout covers proper replacement parts and labor, preserving your vehicle's resale value and structural integrity. On the other hand, blurry or incomplete photos can lead to underestimated damage, missed panels, and delayed or reduced settlements.
Thorough photo documentation not only strengthens your claim but also simplifies the repair process at collision centers like 1st Choice Collision, which specialize in collision repair and paintless dent repair. These shops often take additional pre-repair photos to support estimate supplements, further reinforcing your case if the initial insurance estimate falls short.
Timing is everything when it comes to documenting collision damage. The moment you take your photos can significantly influence the credibility of your insurance claim.
Make sure to photograph the damage before moving, towing, or repairing your vehicle. Capturing the scene in real time provides clear evidence of how the collision unfolded and connects the dents to the impact points. Once the area is safe - after addressing any injuries, turning on hazard lights, and moving out of traffic - take wide shots of the entire scene. Follow up with close-ups of each dent and include details like debris, skid marks, weather conditions, and road signs.
If taking photos at the scene isn’t possible, document the damage as soon as your car is in a secure location. Aim to do this within 24–48 hours of the collision or after spotting the dents. This window is crucial because weather, driving, or temporary fixes can alter the appearance of the damage. Features like fresh paint transfer, sharp metal edges, or debris caught in panels can fade quickly. Acting promptly ensures your photos accurately capture the damage as it originally appeared, aligning with the detailed documentation techniques described earlier.
For weather-related damage, the 24–48 hour rule still applies, but with a slight adjustment: park your car under cover first. Move it into a garage, carport, or similar sheltered area as soon as possible, then take photos when conditions are safe. This helps prevent further harm from hail or wind-driven debris and strengthens the link between the dents and the weather event.
Good lighting is key to clear, detailed photos. Daylight works best, with early morning or late afternoon sunlight offering soft shadows that highlight dent depth better than the harsh glare of midday. If you discover damage at night, take a few initial photos for reference, but capture a full set in daylight as soon as you can - ideally the next morning. Proper lighting ensures dent contours are clearly visible.
Rain, snow, or ice can distort the appearance of dents, so move your vehicle to a sheltered spot and dry off the panels before photographing. Once you’ve taken initial photos, cover exposed damage with plastic or tape to prevent further harm. Avoid washing or attempting any repairs beforehand - preserving the damage in its original state is essential.
Most smartphones and cameras automatically record metadata, such as the date and time, which insurers use to verify the timeline of the incident. Don’t alter this information. Instead, back up your photos in a clearly labeled folder (e.g., “Collision – March 15 – Front Fender Dent”) for easy reference. Adding a written note about when the damage was discovered, when the photos were taken, and when the car was moved or protected can further strengthen your claim.
If additional damage becomes visible later - perhaps after cleaning the panels or under different lighting - take new photos immediately and keep them with the original set. Document any temporary measures, like plastic coverings or tape, that you’ve used to protect the vehicle.
For added support, consider involving a professional collision center like 1st Choice Collision soon after notifying your insurer. Full-service repair centers are skilled at capturing damage from the right angles and preserving visual evidence before any disassembly or repair begins, which can bolster your claim even further.
Taking detailed photos of dents can make all the difference between a quick claim resolution and frustrating delays. By capturing clear, well-organized shots from multiple angles, you provide adjusters with the evidence they need to assess the damage’s severity and location. This level of detail not only reduces the chances of disputes but also supports accurate repair estimates, often resulting in faster and smoother settlements.
You don’t need to be a professional photographer to document damage effectively. Simple steps - like using natural daylight, snapping extra photos, and keeping them organized - can create a strong visual record. Even minor dents or low-speed collisions can lead to costly repairs or disagreements, so treating every incident with care ensures you’re prepared when filing a claim. This kind of preparation strengthens your case and helps streamline the repair process.
Acting quickly is key. Taking photos immediately after a collision, before moving vehicles or making temporary fixes, preserves an accurate record of the damage. This proactive approach helps avoid disputes about whether dents were pre-existing or worsened later, giving you a stronger position with your insurer.
If you’re unsure about your photos or need expert advice, collision centers like 1st Choice Collision can help. They can review your images, identify any missing angles, and even provide high-quality supplemental photos at the shop. Plus, they offer professional repair estimates and guidance on which photos are most valuable to adjusters. Their lifetime nationwide guarantee on repairs adds confidence for both you and your insurer.
Keep these tips handy and use them after any collision - whether it’s a minor scrape or a major accident. Share your photo set with both your insurer and a trusted repair center to ensure accurate estimates and a solid repair plan. Thorough documentation, combined with expert support, can make the claims process faster and ensure quality repairs.
Including the Vehicle Identification Number (VIN) in your photos is a smart way to connect the damage directly to your car. Since the VIN is a unique identifier, pairing it with images of the dents gives insurers clear, reliable evidence for your claim.
You can usually find the VIN on the dashboard near the windshield or inside the driver’s side door frame. Make sure to take a clear photo of the VIN and include it with the pictures of the damage. This simple step can help make the claims process smoother and eliminate any uncertainty about which vehicle the photos pertain to.
To take clear, detailed photos of car dents, natural daylight is your best friend. Place the car in a well-lit outdoor spot, steering clear of harsh direct sunlight that can cause glare or unwanted shadows. Overcast skies or the softer light during early mornings and late afternoons usually provide the most even lighting. If you're indoors, opt for bright, diffused lighting to reduce reflections and make sure the dent stands out clearly. Before submitting the photos for your insurance claim, double-check that all the dent's details are visible and easy to identify.
To keep your photos organized and make your insurance claim process smoother, try these straightforward tips:
By following these steps, you'll make it easier for claims adjusters to evaluate the damage and speed up the process.